This will need to be done before setting up a new printing job for a commercial customer. First you will need to login to the FTP server via the Hyper-V manager on S1 or S2 and create the folders or you can create them through Filezilla as well. Just look at one of the other commercial customers and copy the file structure for that.
- Login to the Workspace server 192.9.200.123 using the prepress1 login.
(There are two Workspace servers and either may be in use. Check the physical server in the back of prepress room if there is no response from that IP address.)
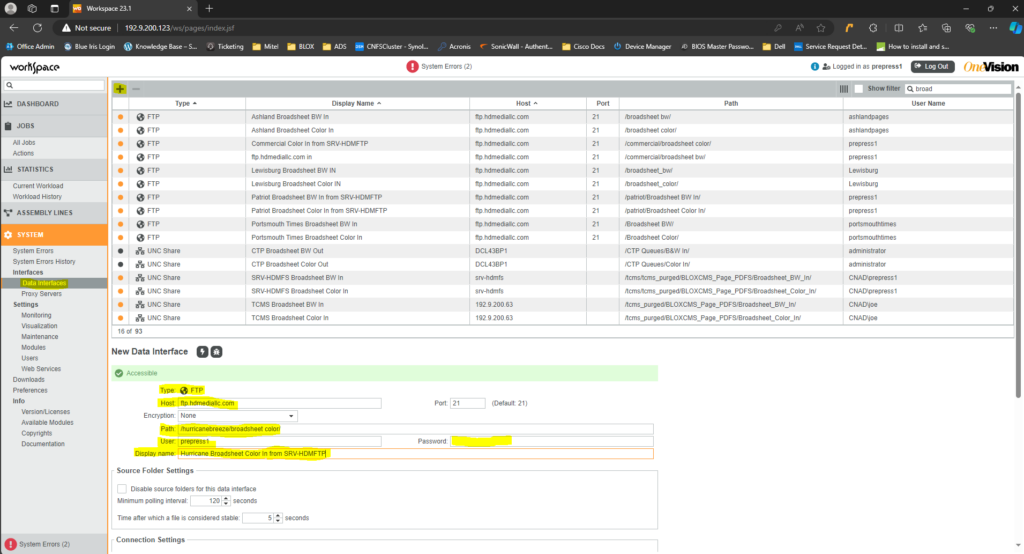
- Once you are logged in, select Data Interfaces from the menu on the left.
- You will then press the + button to add a new interface and select FTP.
- Enter the host details in our case it will be ftp.hdmediallc.com.
- Enter the path for the folder you created on the FTP server.
- Use prepress1’s credentials for the User and Password fields.
***If you do not use prepress1 credentials and you use the credentials that you created for the customer, then it will mess with the path and home directory of ftp. When using the customer credentials, it will take you directly into their folder instead of having to specify /customername/broadsheet color in the path.*** - In the Display Name make it the name of the Paper, type of page coming in (Tab BW or Color, Broadsheet BW or Color)
- Press the lightning bolt at the top beside new data interface to test and see if the path is accessible. Once you have the data interfaces created you can move onto setting up the assembly lines.